Before you build your first routes, look at where passengers want to travel and what your chosen industry needs. Follow visible demand, connect a simple passenger interchange, and complete one cargo chain before adding more vehicles. When you expand, check the supply feeding that chain, the platforms your lines use, and maintenance along the route.
The steps below follow Squirrel's early-game playthrough, which builds a Rye to Camelford bus network and a meat chain into Romford:
Where should you build your first passenger line?
Open the overlays and select passenger flow. Read public and private transport separately: green public transport shows the passengers you already move, while private transport shows journeys you could serve.
In Squirrel's map, a lot of private traffic ran from Rye toward Camelford and much less toward Harpenden, so Camelford was the direction to serve. Run the same comparison on your own map.
Check your choice: you can point to a direction with heavy private traffic that the green public flow does not cover yet.
How do you connect a town to an intercity bus route?
Keep the interchange simple: one intercity line plus local services, instead of one long line doing every job.
Prepare the passenger station
Configure a bus or tram station, add passenger platforms, and connect its road entrance and exit. Add a stop at that interchange to the local service. Check that the station has passenger platforms and that its roads link to the surrounding network.
Create the intercity line
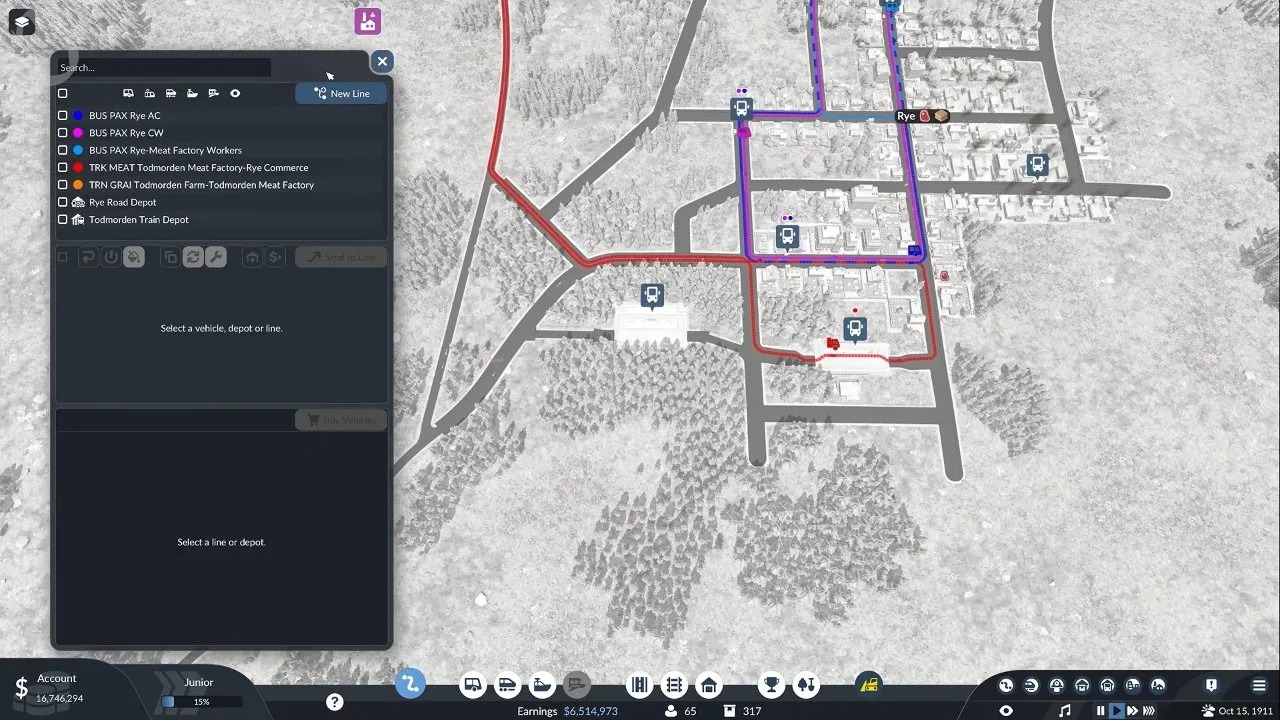
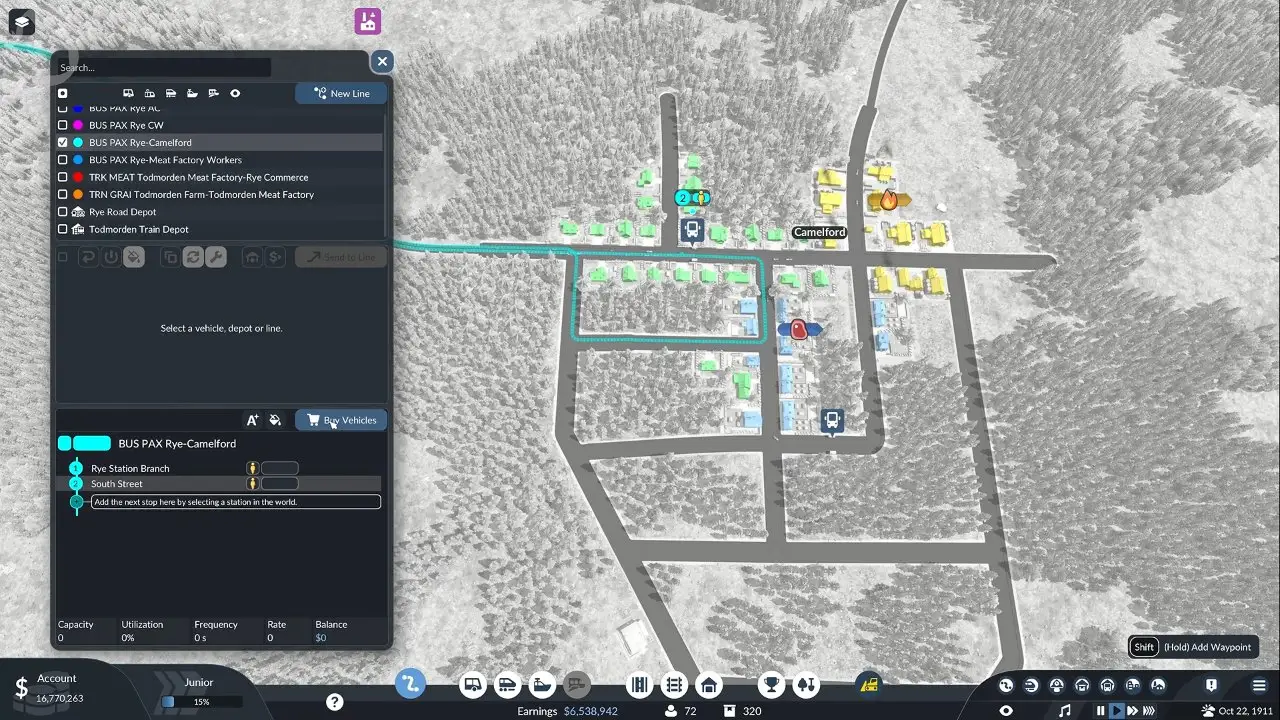
Open the line manager, create a new line, and select the departure platform and the destination stops. In the Rye to Camelford example, the route runs into the residential area and loops back. Check the displayed route and stop order before buying vehicles.
Buy the buses
Select the line and click Buy Vehicles. The purchase list only offers vehicles that fit the line's transport type.
Feed the interchange locally
Create separate clockwise and anticlockwise local lines when you want both directions around a town, each as its own new line. Select the two lines to confirm their paths run in opposite directions and meet the intercity interchange. Squirrel drew one loop the wrong way at first and had to delete and redraw it.
Put a road depot near the destination town so new vehicles do not spawn far away, and connect it to the road network. When the map gets busy, use the line visibility controls to show only the lines you are checking.
Which industry is easier to understand first?
An industry can look productive while still being unable to supply your delivery line. Read its production and inputs before you build the downstream route.
A producer without required inputs: easiest to learn on
A fishery produces fish without any incoming deliveries. Its menu shows output and production, so you can check the source before building the chain. Workers raise productivity, but you do not need a raw-material route to it.
Check the setup: the fishery's output and production entries show fish being produced.
A processor with a required input: build the supply leg first
A brick factory needs clay from a quarry. In Squirrel's network, the meat factory had strong productivity but no grain, and adding a meat route to Romford did nothing about that shortage.
Check the setup: open the industry and see whether its required input is arriving. If it is missing, fix that leg before buying vehicles for the finished product. For a longer supply route, see connecting distant resources and industries.
How should you set up your first cargo delivery?
Add a goods platform at the pickup station, create the line from there to the destination's commercial district, and check that the line shows the right cargo (meat, in this example).
Filter the vehicle purchase menu for meat and buy a compatible truck. Watch it reach the pickup station and load before it heads toward town. If your chain changes transport types, use the cargo transfer guide for the next connection.
For the long trip to Romford, Squirrel set full-load waiting with a maximum wait of about six minutes, so trucks do not drive the whole way half empty. Adjust the timer to your route.
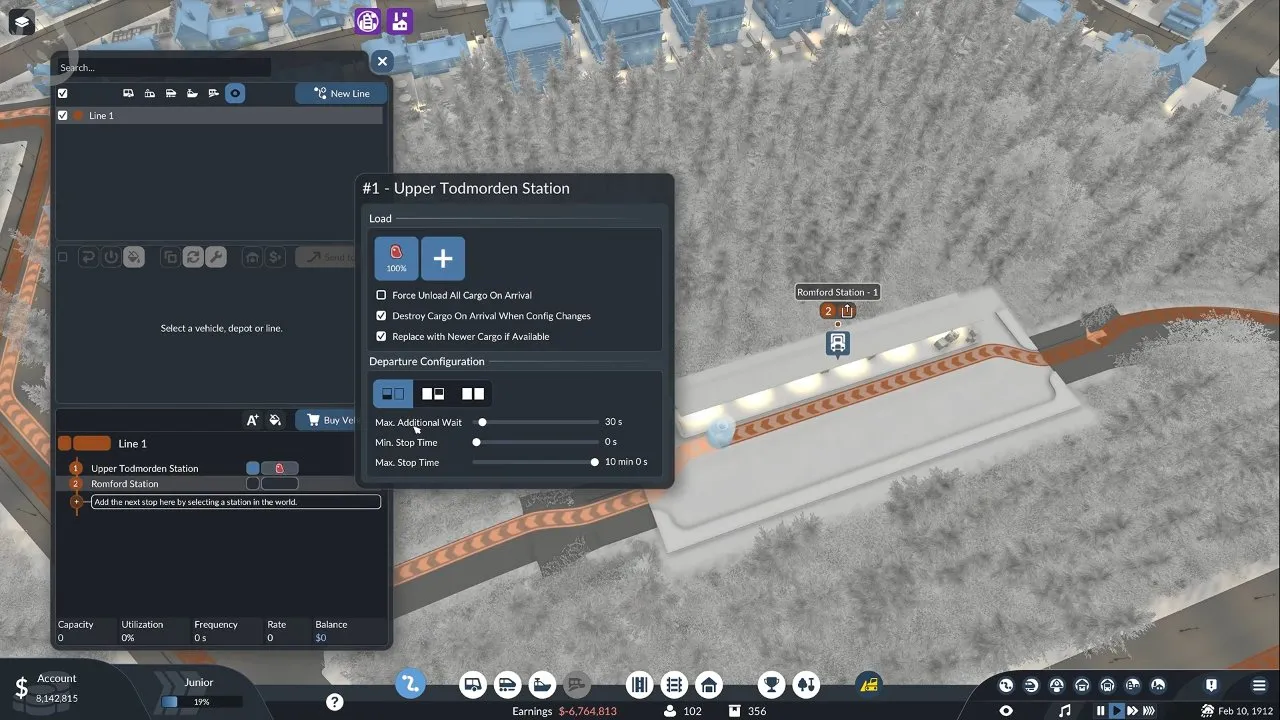
Check the settings: the pickup stop shows the full-load rule and maximum wait you chose. A truck waiting there is following that rule, not stuck.
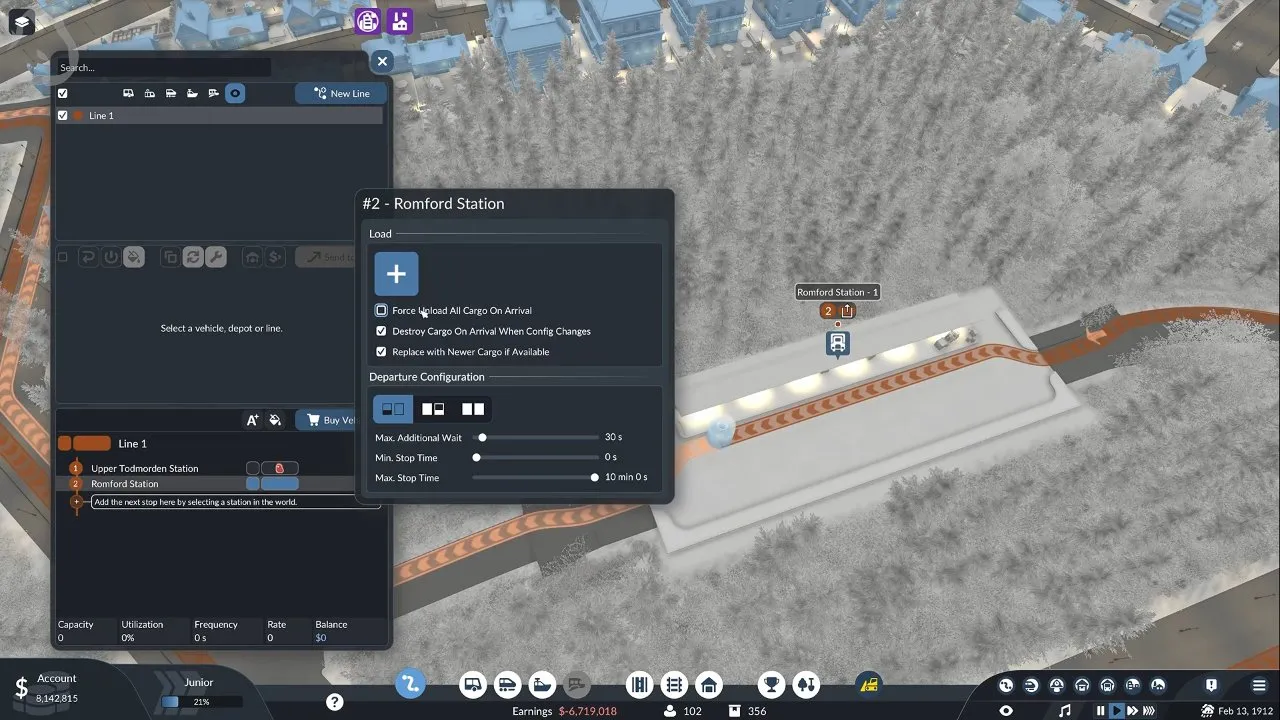
Forced unloading can discard cargo the destination does not want. Squirrel used it so unwanted meat would not ride back and forth, spoil, and upset residents. An empty truck coming back does not prove the town accepted the delivery.
When should you add vehicles or wagons?
Follow the shortage upstream. If two meat lines draw from the same factory and it lacks grain, more meat trucks will not help. Add grain capacity instead.
For trains there is a shortcut: select the train, click Modify, open Wagon, pick grain wagons, add as many as you want, and apply. The new wagons attach to the back of the train right away, with no depot trip.
Check the change: the extra wagons show on the train, and the receiving factory's grain stock starts to recover.
Fish works the same way. If the fishery's stock keeps running down, try fewer trucks or ships on that route and watch whether stock and production recover.
What should you check before adding a second train?
Separate platforms when arrivals would conflict
Add another platform when two trains would compete for the same arrival point. After changing track, also check each line's assigned stop: a connected station can still leave a line broken if it targets the old platform.
Select the line, choose Move stop, and click platform two. The stop moves there and frees platform one for the other train. If the line still cannot connect, see train cannot find a route.
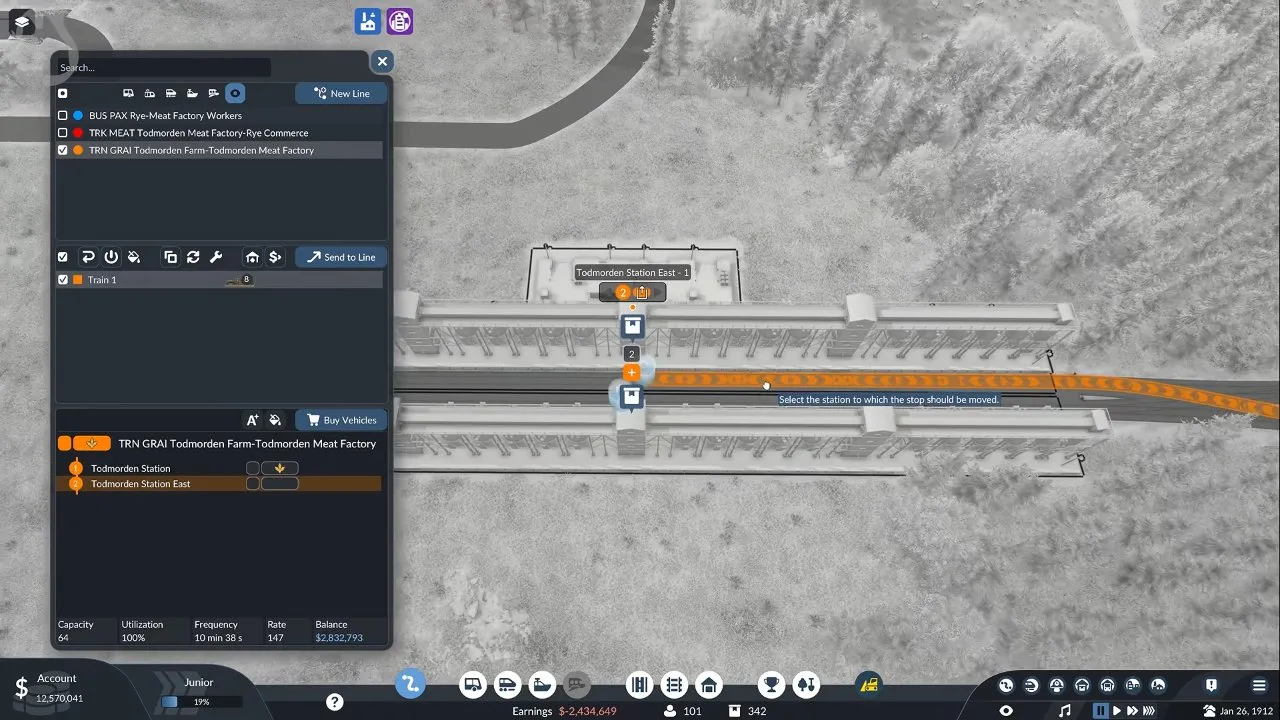
Shared track: check blocks and signal directions
In Squirrel's network, a second train stopped because the connected track was one large block with no signals. Placing signals split it into blocks and the train moved again.
Use one-way signals on track used in one direction only. A shared section with traffic both ways needs two-way signals, and double-tracking it is the better long-term fix.
Check the result: the stopped train starts moving, and both services have a usable path through the shared section.
Where should you put maintenance, and what comes next?
A train passing quickly through a maintenance area gets less time there than one sitting at a loading station, so place the maintenance building near the station where trains wait. Maintenance buildings do not need a road connection.
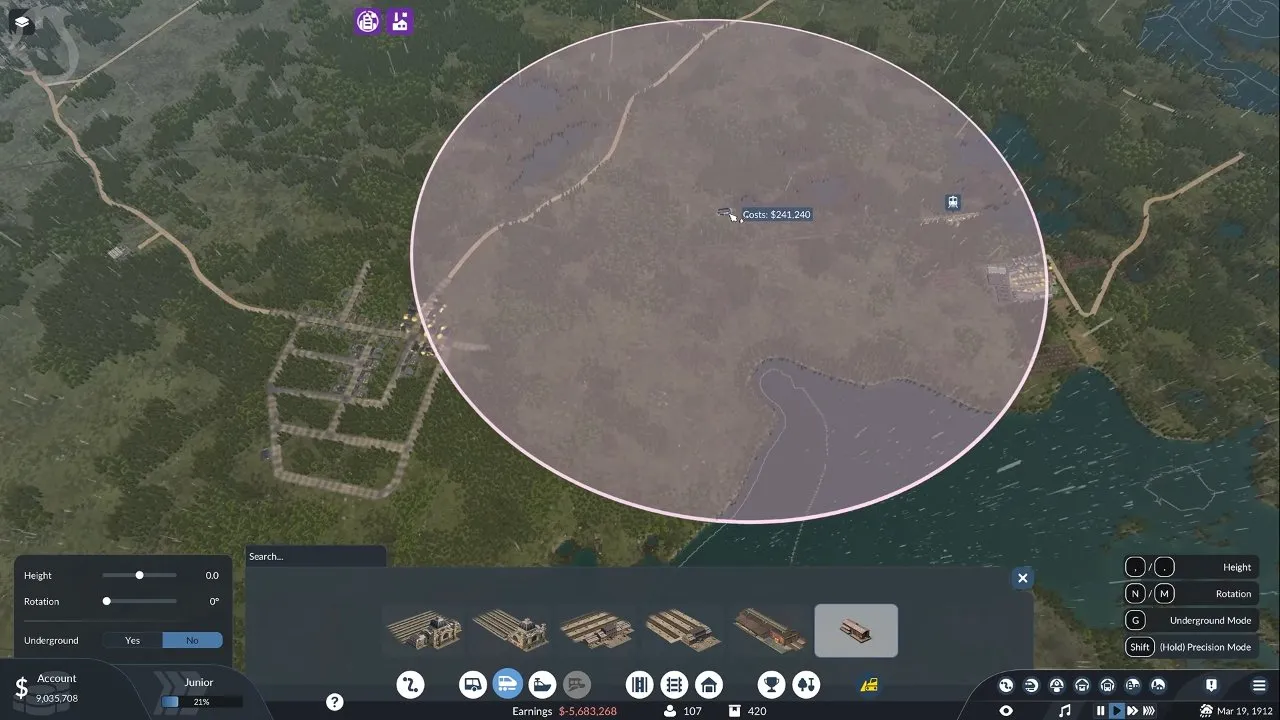
Check that the waiting station sits inside the coverage circle, then watch the train's condition. With one train on the line, one building is enough; add more only if condition keeps dropping.
Keep noise away from homes too: put maintenance buildings away from housing and route fish trucks through commercial areas where you can.
If trucks reach town but deliveries are slow or incomplete, continue with slow or partial cargo unloading. If expansion leaves your finances struggling, see bankruptcy despite profitable lines.